Create a configuration
A configuration is started from the WebArchitect start screen or by selecting “New Configuration” from the top Menu.
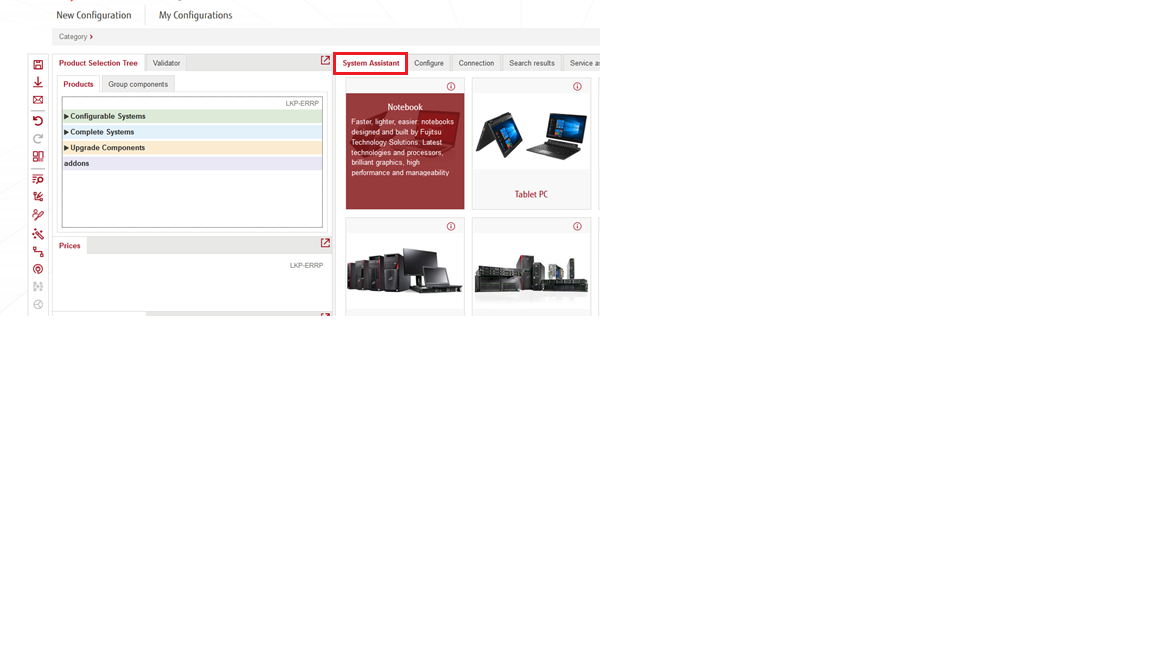
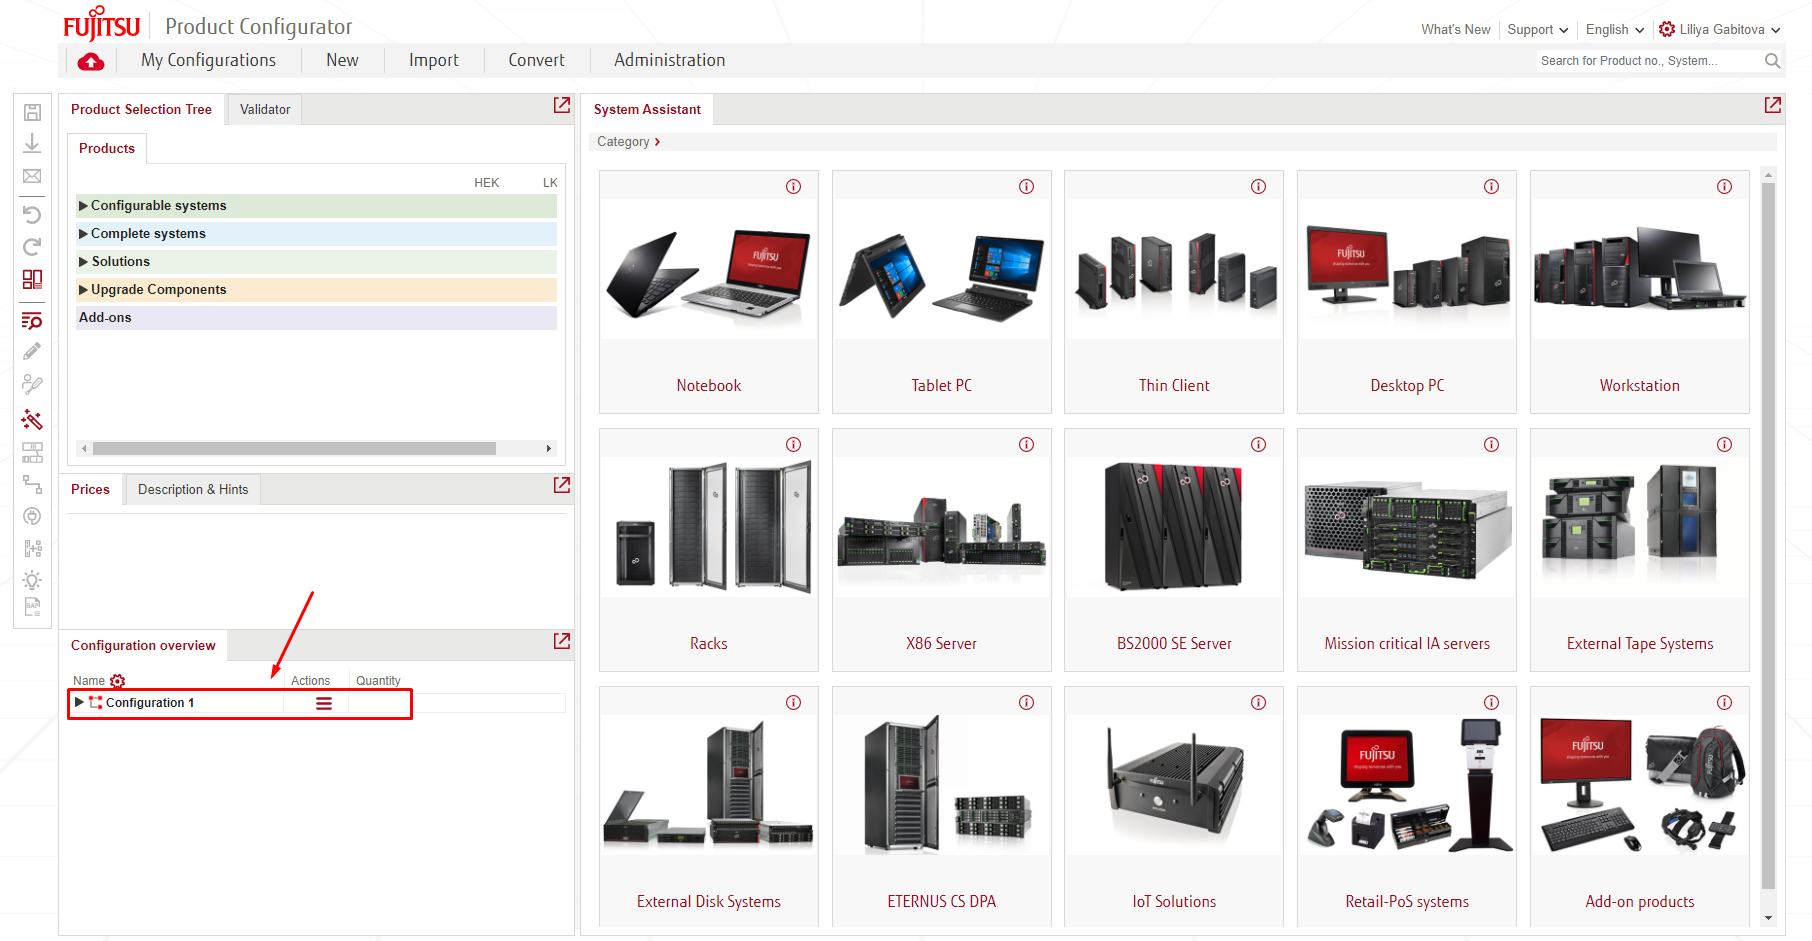
Select the product you want to configure by opening the product tree or using the System Assistant.
System Assistant
The System Selection Assistant guides you through the product categories and series. Select a product category.
If available select a product series e. g. Notebook series.
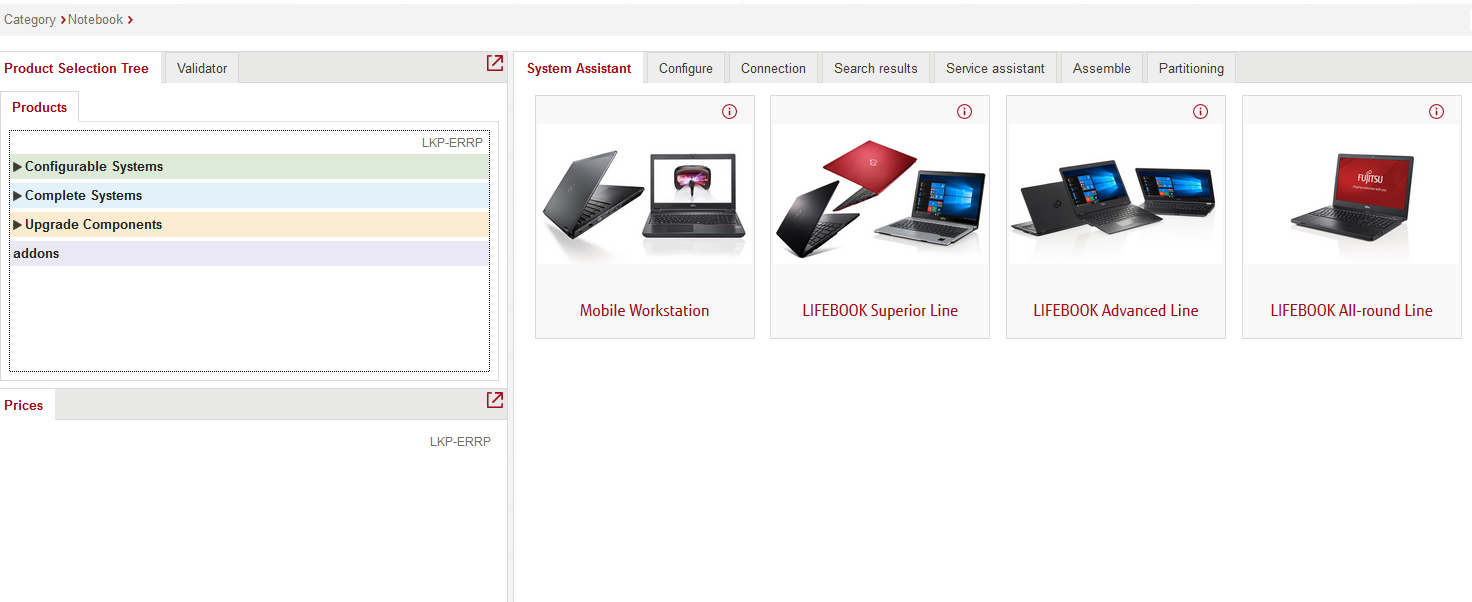
After selecting a category and series (optional), the system selection opens.
The offered products in Product Selection tree matches the current selection in System Assistant:
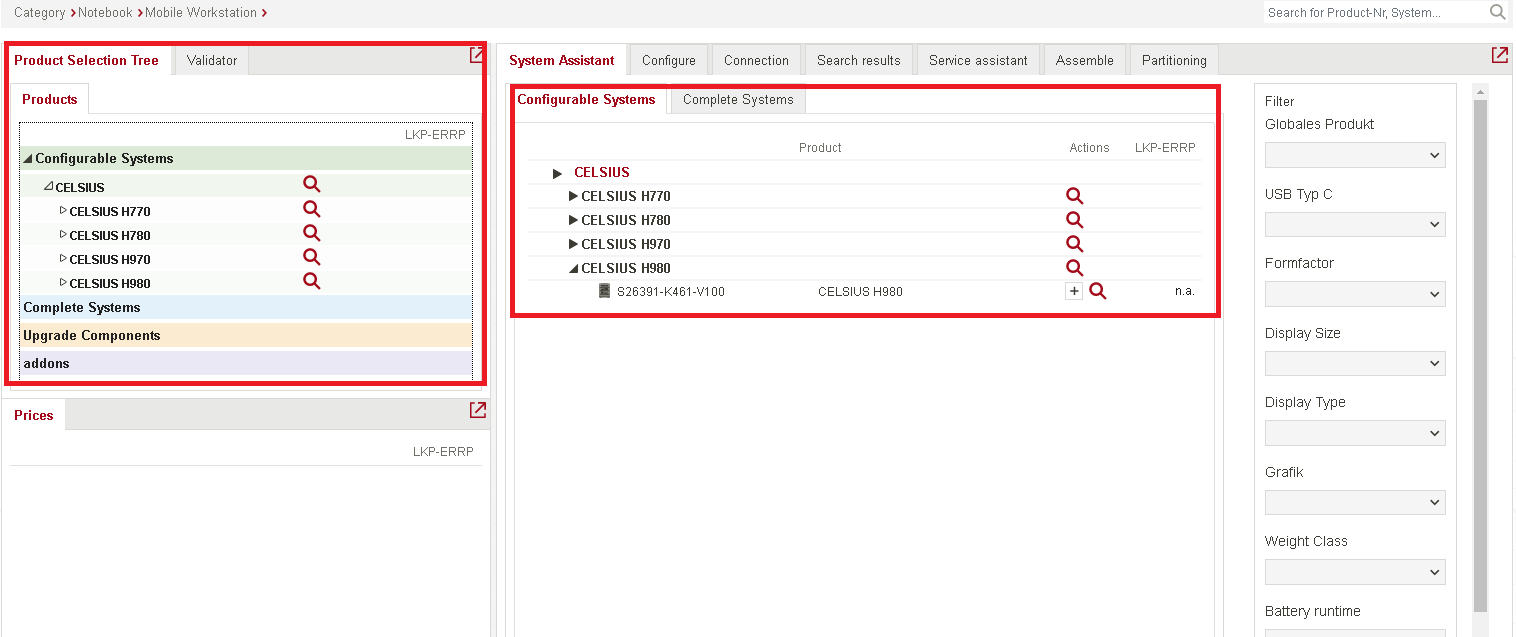
It is possible to switch between Configurable Systems and Complete Systems in System assistant by clicking on the respective tab.
Configurable Systems can be configured individually. Complete Systems are already configured Systems which can be enhanced with options.

Each system has a context menu with the following options:
| Shows configuration details |
| Add product/system to the configuration |
Filtering
To narrow the list of available systems you can use the Filter options on the right. Choose the parameters from the filtering list:
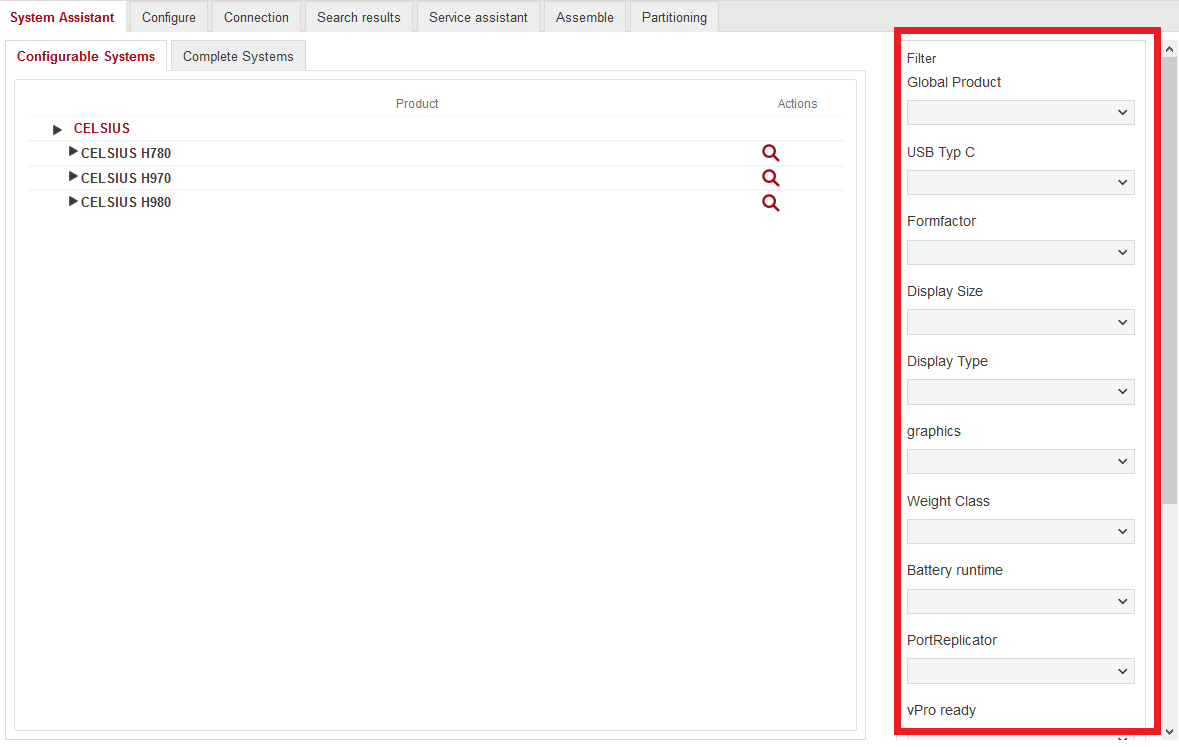
Note: the available filters and parameters are dependent on the product category.
VFY availability
Now you can see the VFY availability at distributors for Complete Systems:

Product tree
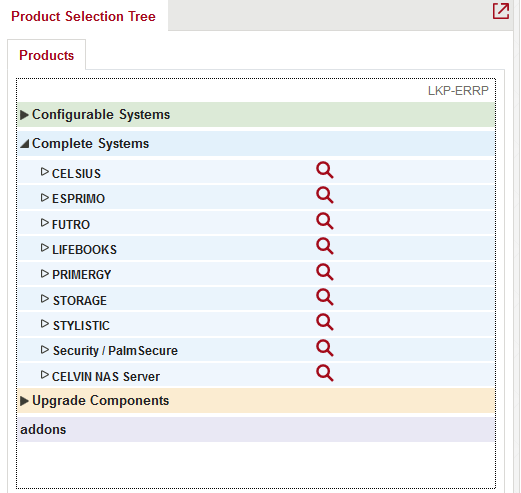
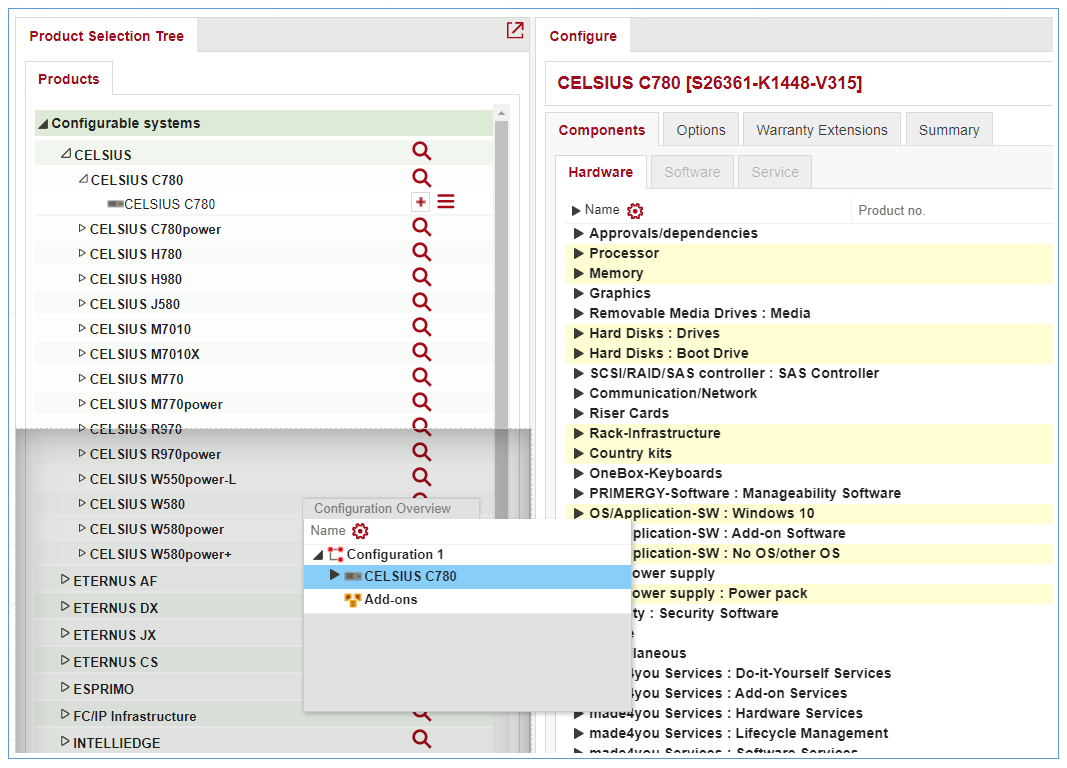
Product selection tree shows all available products. Open the product tree with the triangle symbols and select the product you want to add to the configuration. All selected products will be displayed in the Configuration overview frame.
VFY availability
Also, it works in Product Tree and you can see near the star simple traffic light with circles:
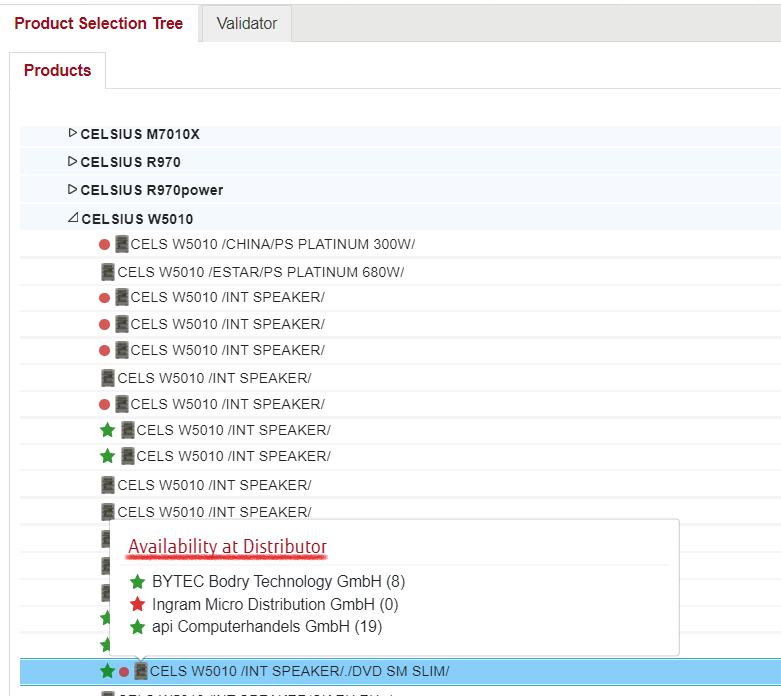
* Green – VFY system is available at least at one distributor
* Red – VFY system is not available at any distributor
Configure frame
As soon as you have selected a system from the product tree or with the System Assistant, the Configure frame opens.

The main Configuration page consists of the frames:
Products Selection Tree
Configuration overview
Configure
Validator
Prices
You can manage columns by dragging a border between column names and dropping it at the place, where you want the column to end and by drag&drop between any columns:
Also, it is possible to reset columns in gear icon:
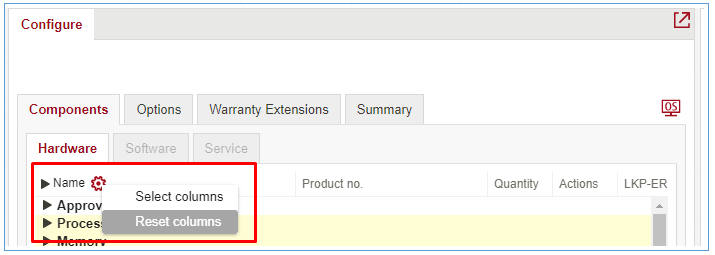
And select columns pressing on Select columns in gear icon
You can arrange frames as suits you, move them around and adjust the width of the columns. To move the frame, click on its header and drag&drop it to the new location.
To adjust the width of the frames/columns, hover over the border between the columns, until the ↔ symbol appears, then perform a single click and move the border wherever you like.
An icon ![]() in the top right corner of every frame allows to expand this area. When frame is maximized click on
in the top right corner of every frame allows to expand this area. When frame is maximized click on ![]() button to restore to the normal size.
button to restore to the normal size.
Manage columns in configure frame
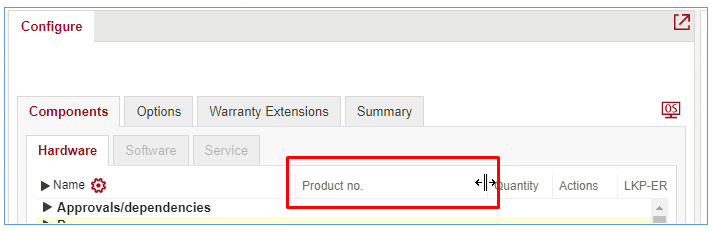
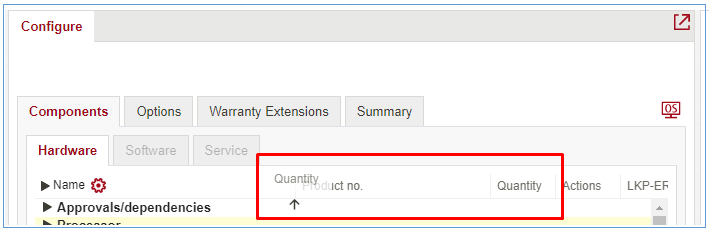
In configure view you can adjust the width and order of the columns as suits you.
You can manage columns by dragging a border between column names and dropping it at the place, where you want the column to end and by drag&drop between any columns:
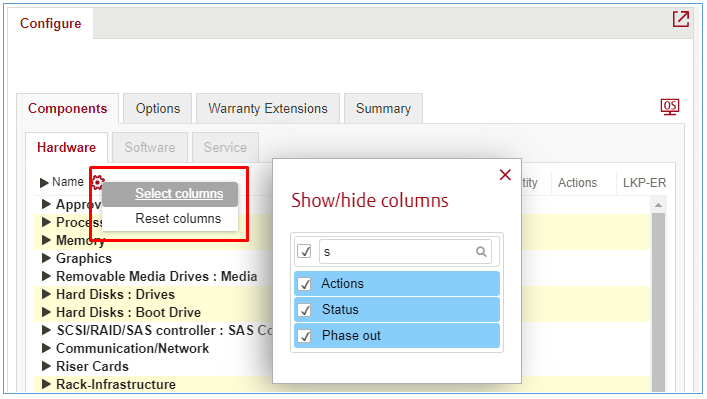
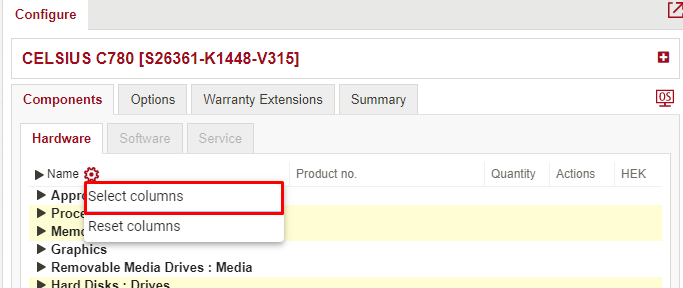
Click on gear icon to open columns settings.
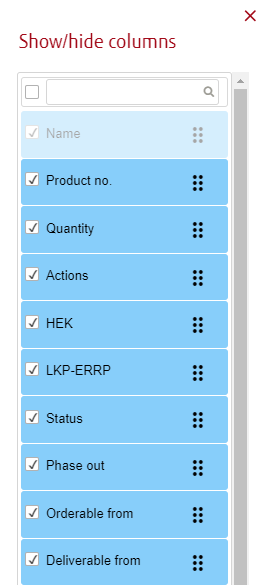
Click “Select columns” to choose which columns to show or hide and change the position of columns.
You can select and deselect columns to display. By dragging the six dots icon you can change the order of the columns.
Click on “Reset columns” to reset all changes you’ve made:
You can arrange frames as suits you, move them around and adjust the width of the columns. To move the frame, click on its header and drag&drop it to the new location.
To adjust the width of the frames/columns, hover over the border between the columns, until the ↔ symbol appears, then perform a single click and move the border wherever you like.
An icon ![]() in the top right corner of every frame allows to expand this area. When frame is maximized click on
in the top right corner of every frame allows to expand this area. When frame is maximized click on ![]() button to restore to the normal size.
button to restore to the normal size.
Description
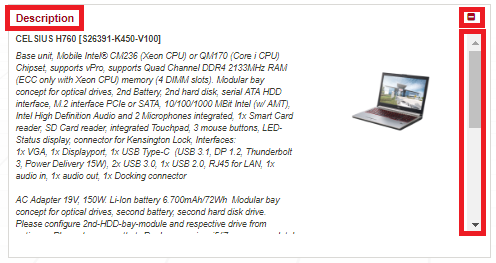
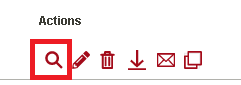
When you add a product/system to configure, the Configure frame is shown. To get full information about the product/system click on the ![]() icon in the right top corner.
icon in the right top corner.
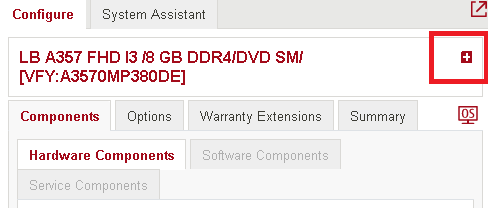
You can see the description window.
To minimize this window use small icon ![]() in the right top corner.
in the right top corner.
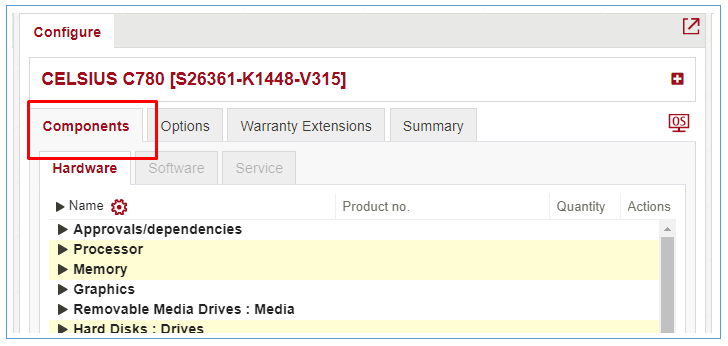
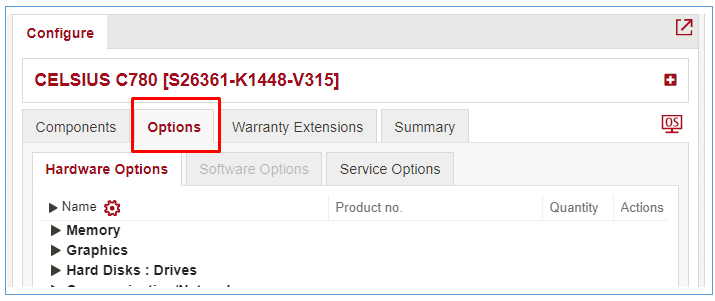
In general, the Configure frame contains 4 tabs:
![]()
Components
Lists all components that can be built into the current base unit. Components can be added to or removed from the configuration using plus and minus buttons next to the component. The buttons are greyed out if the adding or deleting of the component will conflict the configuration rules.
Options
Choose the additional components to the configured product.
Warranty Extensions
Warranty Extension tab shows possibility to add additional warranty. In Action column, you can check Details and add some Item. The filtering is available to navigate to the correct type of warranty.
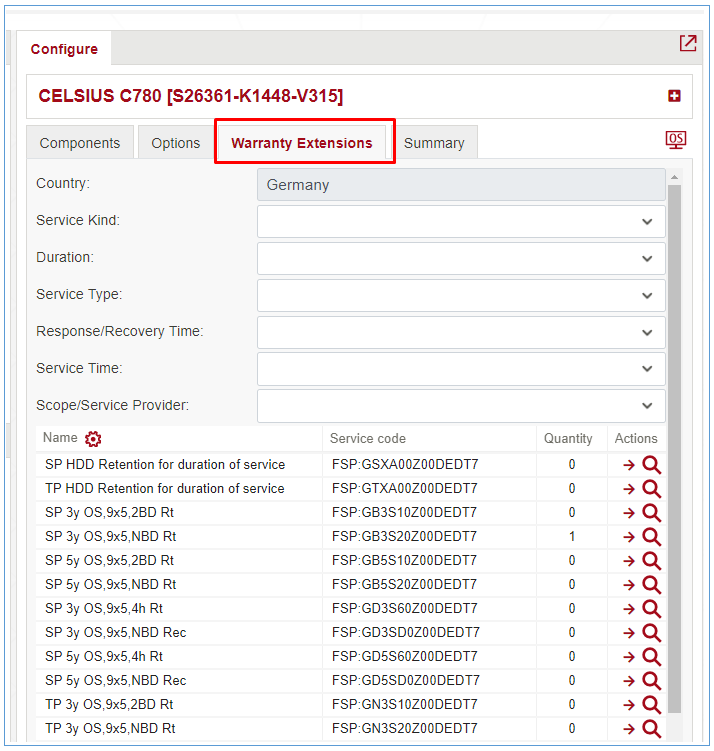
If a component has service extensions available then this tab is enabled.
The tab is disabled if there is no any service extensions available.
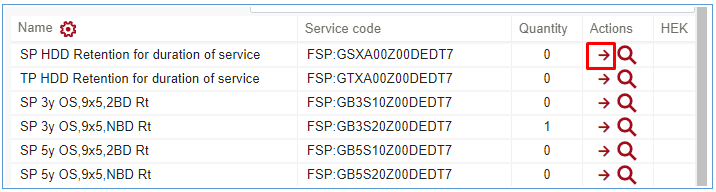
To add a warranty to a configuration, click on a ![]() Select icon :
Select icon :
An extension of this tab’s functionality – is the Service Assistant, explained in paragraph 5.10 of this document.
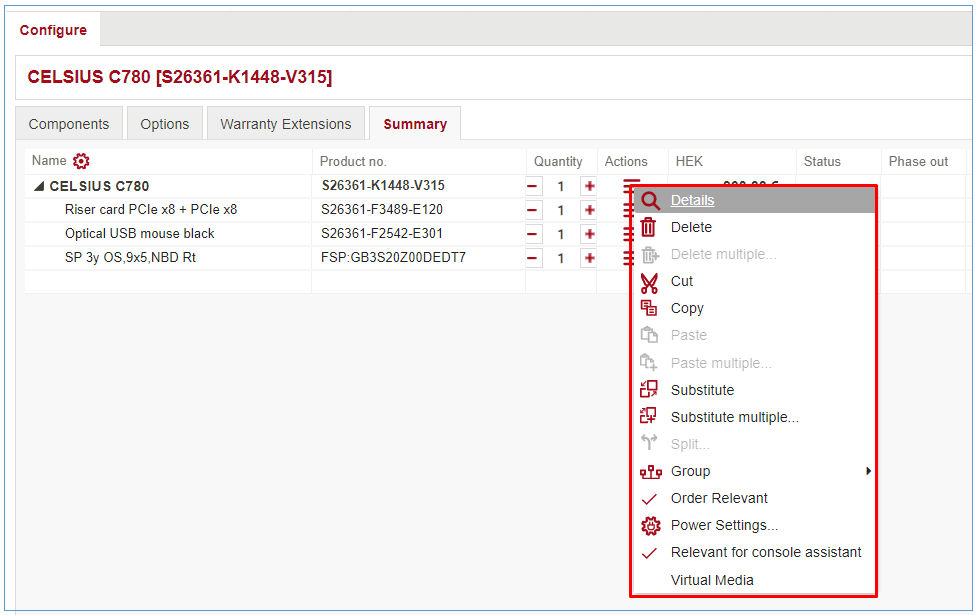
Summary tab
Summary tab is available for Configurable system, complete system, Configuration tab and DX system.
It contains configurable component and its subcomponents in a tree structure.
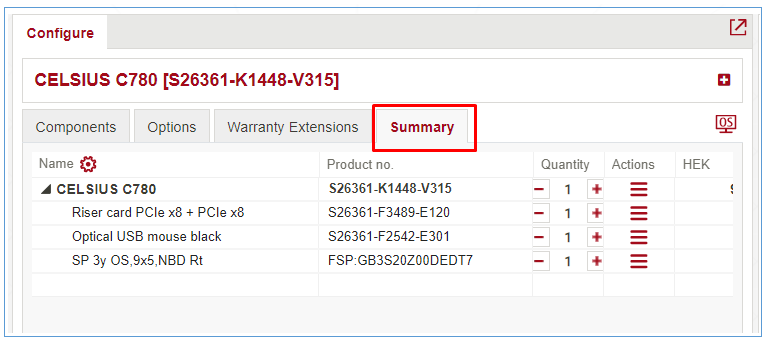
The total sum of the configuration may include all necessary panels, without being explicitly shown as an item.
There are some actions for each component:
Display of availability Information

The availability information is shown in the Components and Options tabs in the configuration view.
Display of price changes
If the price of a component was changed in the last period, the special yellow flag will be shown in Prices column of Summary tab:

Validator notifications
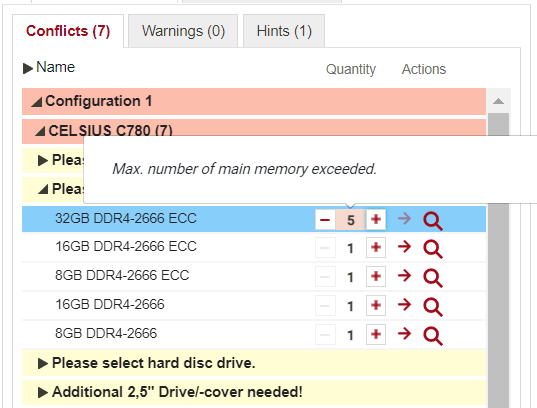
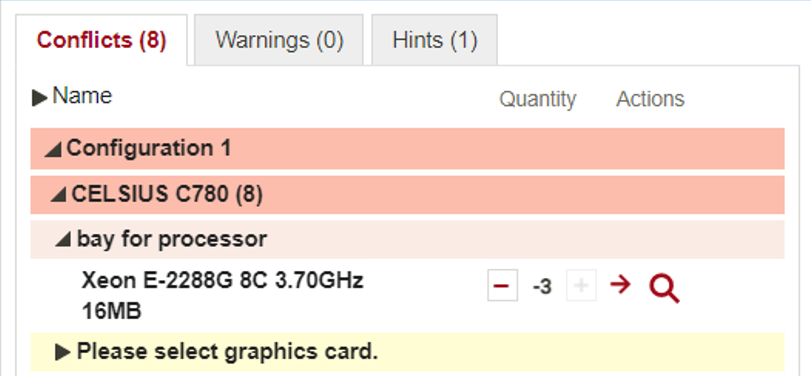
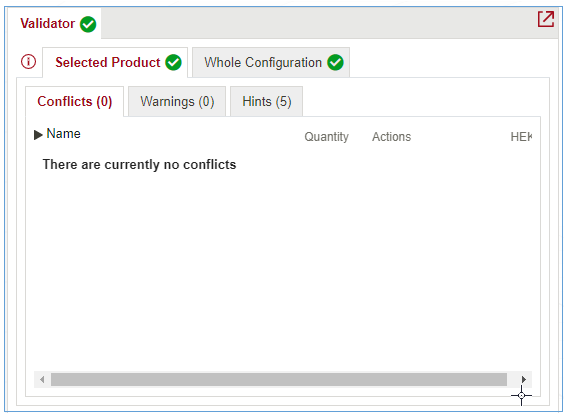
There are 3 types of notifications in Validator: Conflicts, Warnings, Hints.
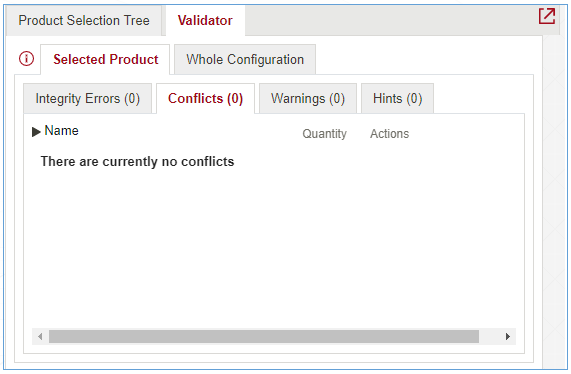
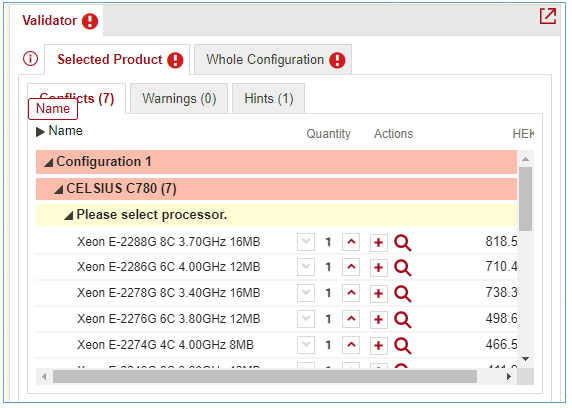
Conflicts
In Conflicts tab missing or excessive components are shown. Until all Conflicts are fixed, configuration can’t be counted as Completed. Conflicts can be resolved in two ways:
By adding a component - for this conflict a list of components is provided, that can resolve this conflict. Use arrow icon to add necessary component:
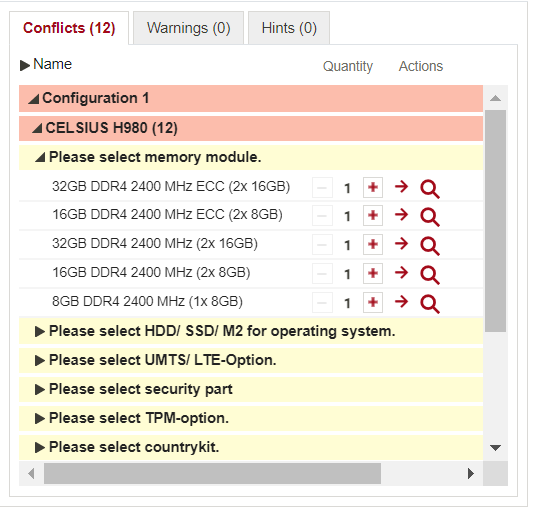
Quantity is prefilled with minimum necessary count. You can enter quantity higher than minimum for you needs. But if it leads to error, adding icon (arrow) is disable and you can mouse over tooltip with explanation
By removing a component – the component is incorrect to be added for some reason and causing the conflict:
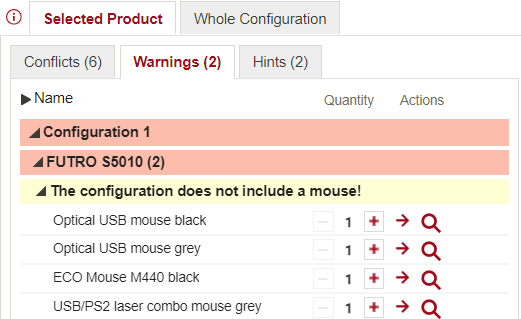
Warnings
Warnings do not prevent configuration from being completed, but highlight the cases of configuration which can be troublesome for a user or which he should pay attention to.
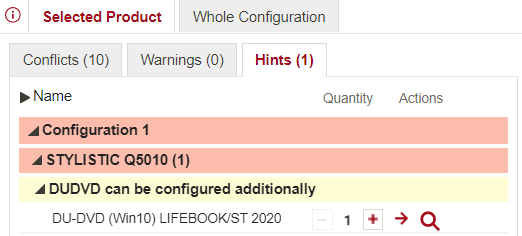
Hints
Hints don’t prevent the configuration from becoming complete, they serve as an additional information to a user.
Integrity errors
Integrity errors occur in case you are opening a configuration that was created with another database then you have currently assigned. In this case if configuration user group and user selected group are not the same, and configuration group is assigned to the user, then warning is shown:
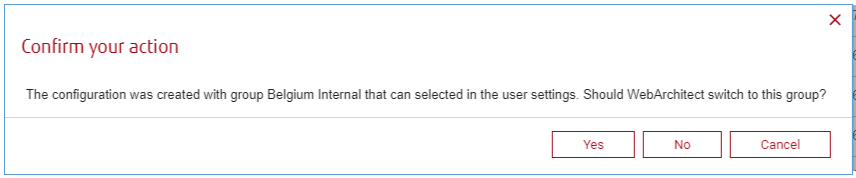
If Yes is selected, then configuration group is selected automatically in “My settings”, configuration is opened in its group.
If No is selected, configuration is opened in the user selected group.
In case if user selected group and configuration user group are not the same, and configuration group is assigned to the user a warning is shown:
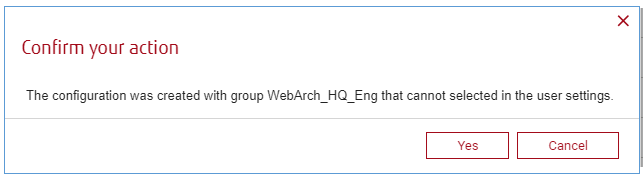
If Yes is selected, then configuration is opened in the user group and then integrity errors will be shown in a separate tab in Validator:
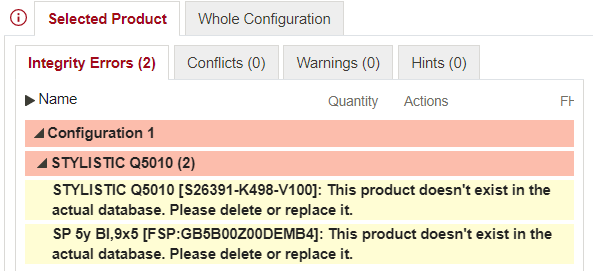
Integrity error may also occur if the configuration was created with the older version of the same database, if some components added to the system are not available in the current version.
User is able:
· to unfold further branches (so several branches/entries are unfolded at once)
· to collapse branches manually (even all)
· to again unfold/collapse branches
Validator traffic lights for config status
For empty configuration, no traffic lights icons are displayed:
If unresolved Conflicts exist, then the traffic lights icons for Validator would be displayed. Icon for Selected Product frame would be red, for Whole Configuration – red and for Validator also red:
If user has more than one system in configuration, and for selected product all conflicts are resolved or didn’t exist, the icon for Selected Product frame would be green, for Whole Configuration – red and for Validator also red, because unresolved conflicts exist for the whole configuration:
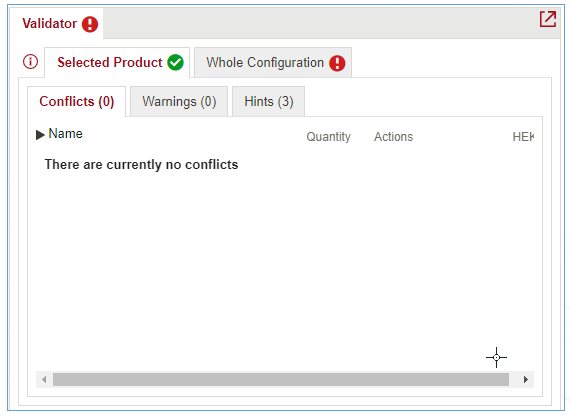
If all conflicts for all products in configuration are resolved, then icon for Selected product frame would be green, for Whole Configuration – green and for Validator also green.
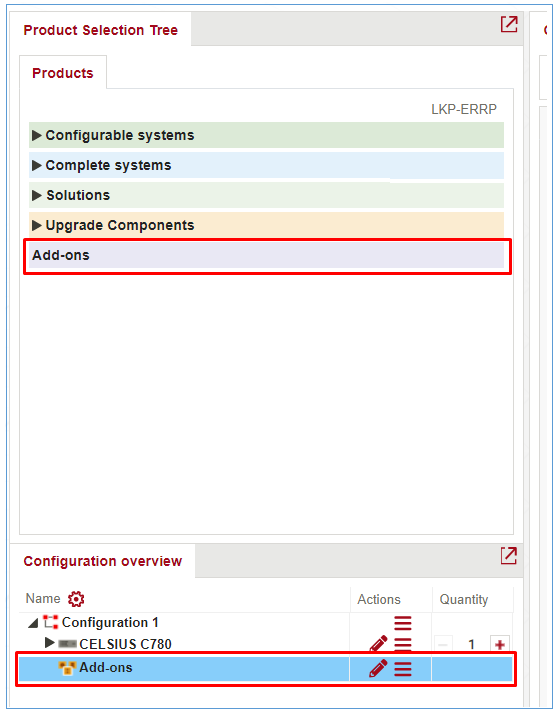
Select Add-on product
For add-on products there is a separate tab exist in Product selection tree. There are two ways to select and add add-on component:
- as a product from Product Selection Tree,
- add add-on component as a product from Product Selection Assistant.
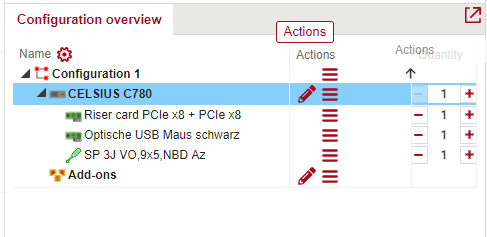
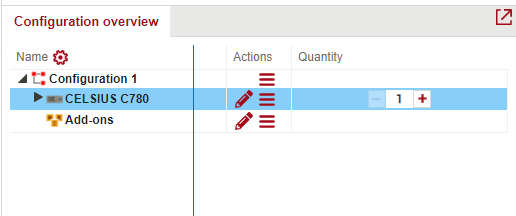
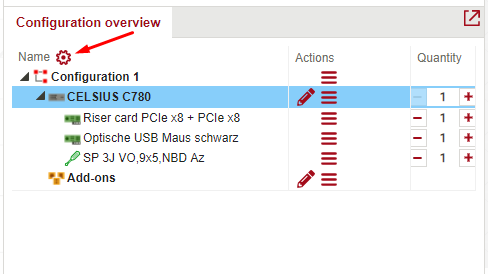
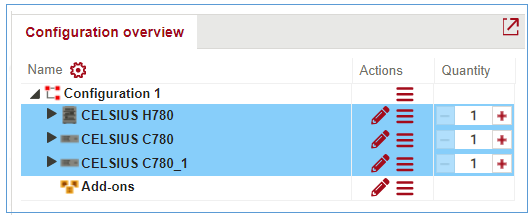
Configuration overview
Manage columns in configuration overview
There are 3 columns in the configuration overview frame: Name, Actions and Quantity. You can adjust the width and order of the columns as suits you.
To change the order, drag the column by its name to the desired position:
To change column width, drag the column border to the desired position:
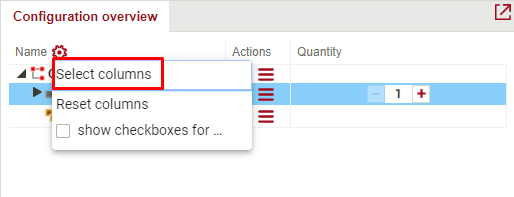
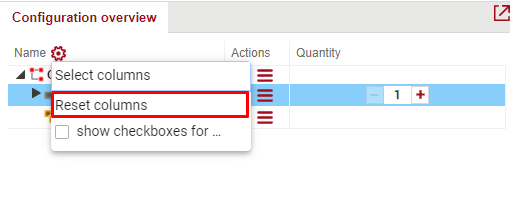
Click on the gear icon to open columns settings.
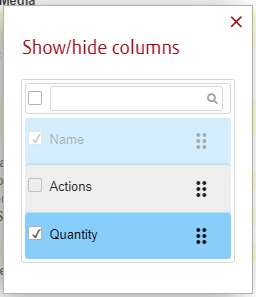
Click on “Select columns” to choose which columns to show or hide and change the position of columns.
You can select and deselect columns to display. By dragging the six dots icon you can change the order of the columns.
Click on “Reset columns” to reset all changes you’ve made.
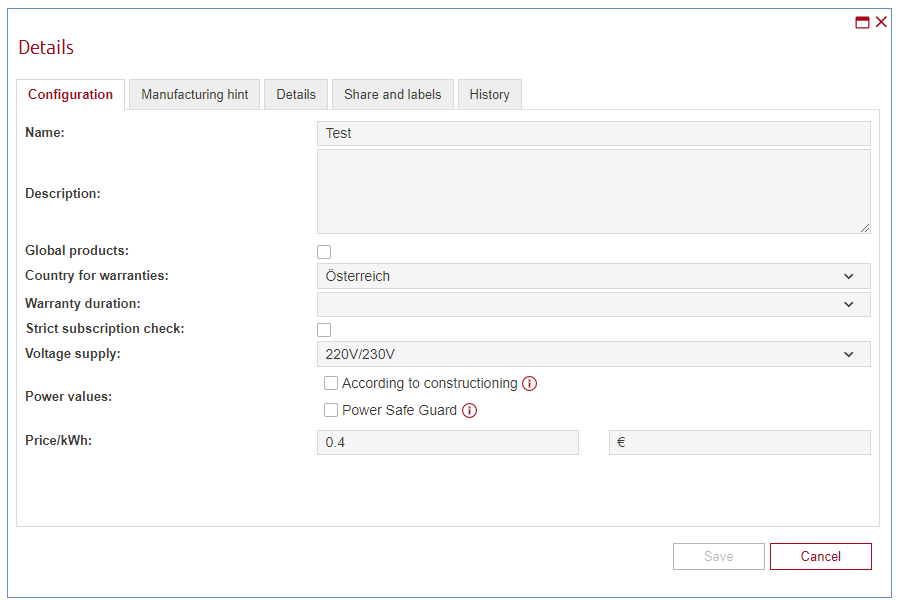
Configuration details
Details are also available for a configuration.
To open them, click on a hamburger menu icon for a configuration name in Configuration overview:

or this window can be called from the My Configurations page via the same icon:
Details window for a configuration can be used to change some parameters of a configuration, add a manufacturing hint and check the history of configuration:
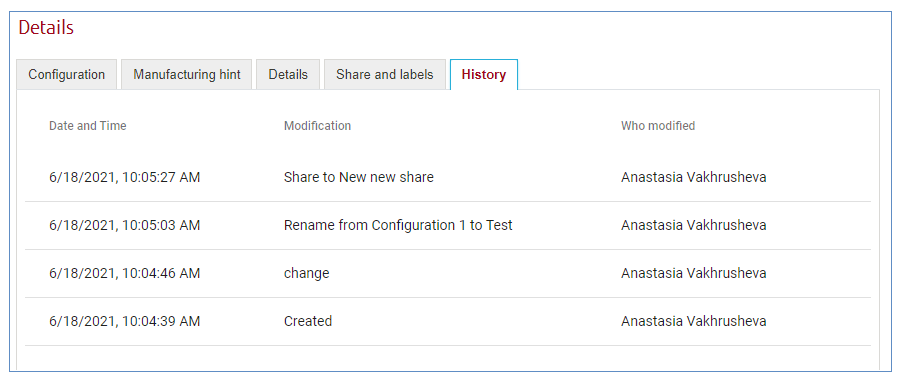
The following actions with a configuration must be tracked and reflected in the WA:
* Create
* Import
* Copy
* Rename
* Changes made into Configuration (adding/deleting components/racks, etc..) * Changes regarding SalesForce (both Quote and SPR)
* Actions of sharing:
o Sharing a configuration (moving from the “My personal configurations” to Shares)
o Stop of sharing the configuration (returning the configuration from Shares to “My personal configurations”)
o Moving between Shares (changing the Share folder of the configuration), for example:
Configure multiple products
It is possible to configure more than one product and check the prepared configuration in configuration overview window. Also it is possible to:
- Copy/Paste, Delete systems from configuration
- show conflicts, warnings and hints per system and for the whole configuration
- Edit Complete Configuration, Edit Incomplete Configuration
- Resolve all conflicts & Save
- Copy/multiple paste
- Export (ASK (.ask), SalesForce file (.xml), Excel (.xls), Json format )
- Clone (Duplicate) multiple configuration
- Delete multiple configuration
-Send by email multiple configuration
- Create multiple configuration that was exported from old WA
- Show conflicts, warnings and hints per system and for the whole configuration
- Add some Options to multiple configuration.
For details, see Components handling
Multiple selection in configuration overview
There is a special function for convenient selection of several products when working on a touch device. To select multiple products in configuration overview you can enable the display of checkboxes for products. Function works for desktops too.
To manage visibility of checkboxes, in configuration overview click on the gear icon and then select “Show checkboxes”.
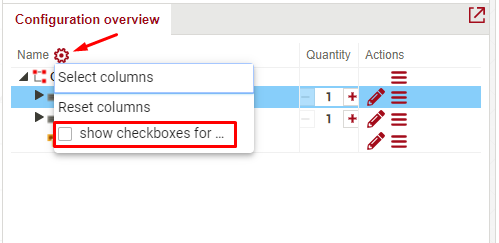
After enabling this setting, all nodes in configuration overview will receive checkboxes. Click on checkbox to select or deselect the product.
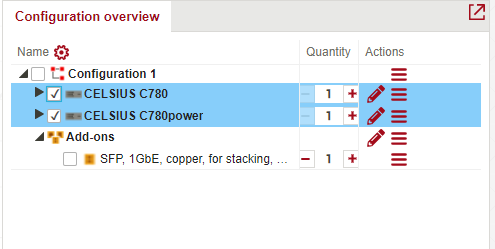
Another way to select several products is to click on product and hold down the CTRL button, then click on the next product. Using checkboxes gives the same result.
Create a configuration from direct input from clipboard
In some cases it’s needed to create a configuration from a parts of another configuration, for example:
you might want to re-use parts from official Packages and Solutions
you might want to re-use elements of other configurations in order not to re-configure everything from scratch
To achieve this the following process is provided:
Open template/source configuration from My configurations page.
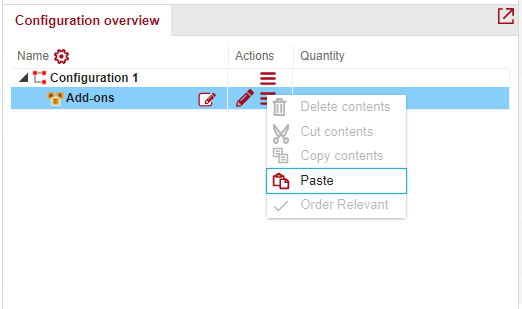
Copy elements to re-use into clipboard using context menu of a product or Crtl+C combination
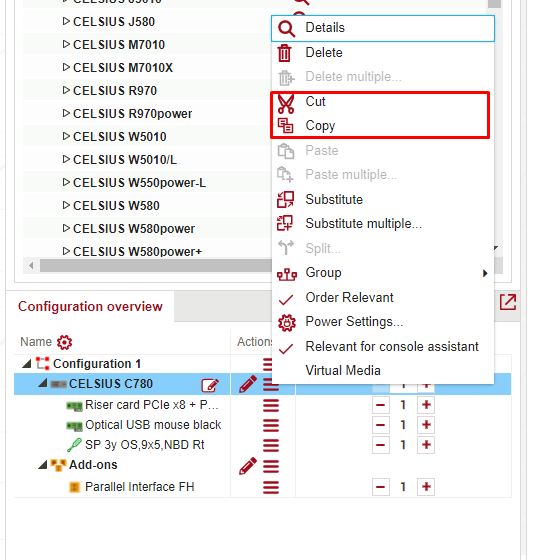
Click on “New” link

You will be taken to the main page. In configuration overview you can see the configuration node called “Configuration 1”. Select configuration node and paste the copied products into the configuration using context menu or Ctrl+V combination.
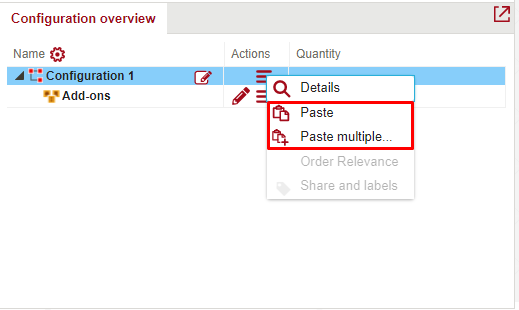
If you want to paste copied addons into the configuration, first unfold the “Configuration 1” node, then select “Add-ons” node and paste products using context menu or Ctrl+V.
Afterwards you can continue to add more new systems to configuration or start configuring.